20080309 update: This article covers BackTrack 2, you might want to consider reading the information on how to install BackTrack 3 beta on a USB stick. This is a much easier process, you will get more tools and the latest versions:
Installing BackTrack 3 on a USB stick
Bootable linux security distributions come and go, first there was Whoppix, than it became Whax and parallel there also was Auditor. But now we have got BackTrack. If Whoppix was the swiss army knife of a security auditor, than backtrack is his lightsword.
So what can we do with BackTrack? You can use it for security auditing, penetration testing, reconnaissance, wardriving, (wireless) network problem solving, actually a better question would be, what can’t you do with backtrack?
So what’s the ultimate geeky thing to do with backtrack? Install it on a USB stick and turn any computer into a stealth auditor toolkit. Today’s 1 gigabyte USB sticks cost less than 20 euro and are all USB-2.0 compliant, so they are fast to boot from. It’s important to stay current with these security distro’s, because if you try a penetration test with old tools, you might as well not do it at all. So we will use the latest beta which is available at the time of writing (bt20061013) and show you how to install that on a bootable thumbdrive.
step 1
Take the USB stick and plug it into a linux computer. If it mounts automagically, become root, type mount and remember the device which belongs to the USB stick (mostly something like /dev/sdc) and umount the device.
If it doesn’t mount automagically, type dmesg | tail and you will see the device that was recognized by the kernel.
Now run fdisk on the device (e.g. fdisk /dev/sdc) destroy all existing partitions and start a new (primary) one which starts at cylinder 1 and ends at +650M which will suffice for the complete backtrack toolkit. Next you can create a second partition (also primary) which fills up the rest of the USB stick and will allow you to use it the way it was intended (for instance transporting files), but is can also come in very handy to put discovered forensic data on that partition. Change both types of the partition to c which is W95 fat32 (lba). Don’t forget to make the first partition bootable.
Write the partition table to disk (USB drive) and exit fdisk. Now fdisk -l /dev/sdc should give you something like:
Disk /dev/sdc: 1020 MB, 1020788224 bytes
129 heads, 6 sectors/track, 2575 cylinders
Units = cylinders of 774 * 512 = 396288 bytes

   Device Boot      Start         End      Blocks   Id  System
/dev/sdc1   *           1        1641      635064    c  W95 FAT32 (LBA)
/dev/sdc2            1642        2575      361458    c  W95 FAT32 (LBA)
Next, put a filesystem on both partitions with:
mkfs.vfat -v /dev/sdc1
and repeat that for /dev/sdc2
step 2
If you haven’t downloaded bt20061013.iso do so now and mount the iso image via the loopback device:
mount -r -o loop /data/iso/bt20061013.iso /FF4/
also mount the first partition of our USB drive:
mount -o rw /dev/sdc1 /FF
and start copying:
cd /FF4/
cp -r * /FF/
step 3
To make the device bootable we will use the syslinux package, if it’s not on your linux system install it with yum install syslinux (or use emerge, apt-get, or whatever). Now do the magic:
# umount /FF
# syslinux /dev/sdc1
# cat /usr/lib/syslinux/mbr.bin > /dev/sdc
and there are a few more steps to make it really work:
# mount -o rw /dev/sdc1 /FF
# cd /FF
# perl -pe 's/boot\///' isolinux.cfg > syslinux.cfg
# mv boot/vmlinuz .
# mv boot/initrd.gz .
# cd
# umount /FF
step 4
put the USB drive in your computer and reboot and see if it boot’s from the USB stick. You might need to alter your BIOS settings for this to happen, or hit some kind of magic key during startup (my DELL laptop requires F12). If all goes well you will end up with:
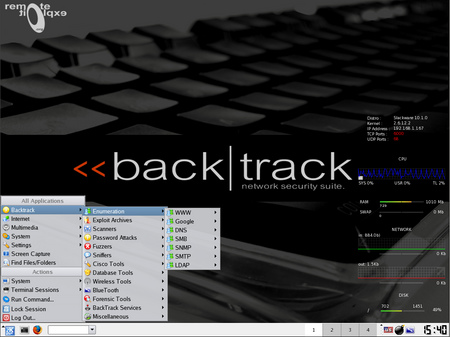
Have fun! and don’t forget to read the tutorials.
Windows
If you are on a Windows system and don’t have Linux installed, you can still follow the same procedure by downloading and booting knoppix. When the backtrack iso is on your C: or D: drive, knoppix will automatically mount and show these drives, and you can still mount the iso via the loopback device (-o loop) as described above.
Other ways of playing around with backtrack
Apart from booting backtrack from USB stick (or from cdrom) there is another very conveniant way of using this distro, and thats by running it inside VMware Server. You can use vmware server for free, but you have to register.
Here is a nice installation guide how to install vmware server on Fedora Core 5. After that you can just fire up vmware console and click together a new Linux machine. In “virtual mchine settings” the cdrom device should point towards your backtrack iso and after that power on the machine. Click the button to switch to full-screen, login as root (password toor) and type startx. You can still switch back forth to your host window manager by using CRTL-ALT-F7 and CTRL-ALT-F8.
N.B.
In most countries it’s only legal to use the auditing, scanning, and forensic tools on your own computer. Use at your own risk!