
After using my 3dprinter for i while i found out that large objects would have the tendency to warp from the bed while printing. The solution for this is to print with a large rim, or upgrade my printer to a heated bed. Having a heated bed would also allow me to print different filament, so thats what i wanted to do.
Hardware
I decided to replace the aluminium printbed with the heated version (this is the one i bought: 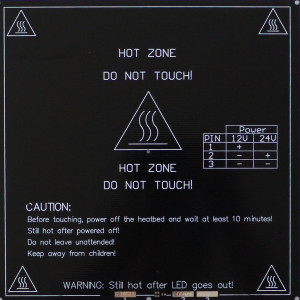 3MM MK3 Aluminum Board Heat Bed because it’s cheap (see the shopping list at the bottom of the article), it’s simple and it doesn’t add mass to the printbed like a silcone heater would do. My Mamba3D has a minitronics board which runs on 12V. But i wanted to use 24V as power source, because this would reduce the current needed to heat up the board and by having a separate power supply i wouldn’t risk scary stuff happening to my minitronics. So i bought a 24V/5A power supply from banggood. Next you need a thermistor so the minitronics computer can measure what the temperature of the heat bed is, and a a couple of electronic components which are used to switch the heated bed on and off.
For the electronics i decided to use a BUZ36 N-Channel MosFET which i had laying around. It can switch up to 22A but the most important fact is that is has a low “on resistance” (R-on) of 0.12 Ohm. This is important because this resistance together with the current will determine the heat it has to dissipate. By using the 24V power supply the current is 4.5A so that computes to 2.5W (P = I*I * R) and the BUZ36 can handle that without the need for extra cooling. But of course you can replace the BUZ36 with an other N Channel MosFET as long as it can handle the current and also has a low R-on. If you need to buy one, you could use the IRFZ44N which can switch up to 20A and has an even lower R-on according to the datasheet.
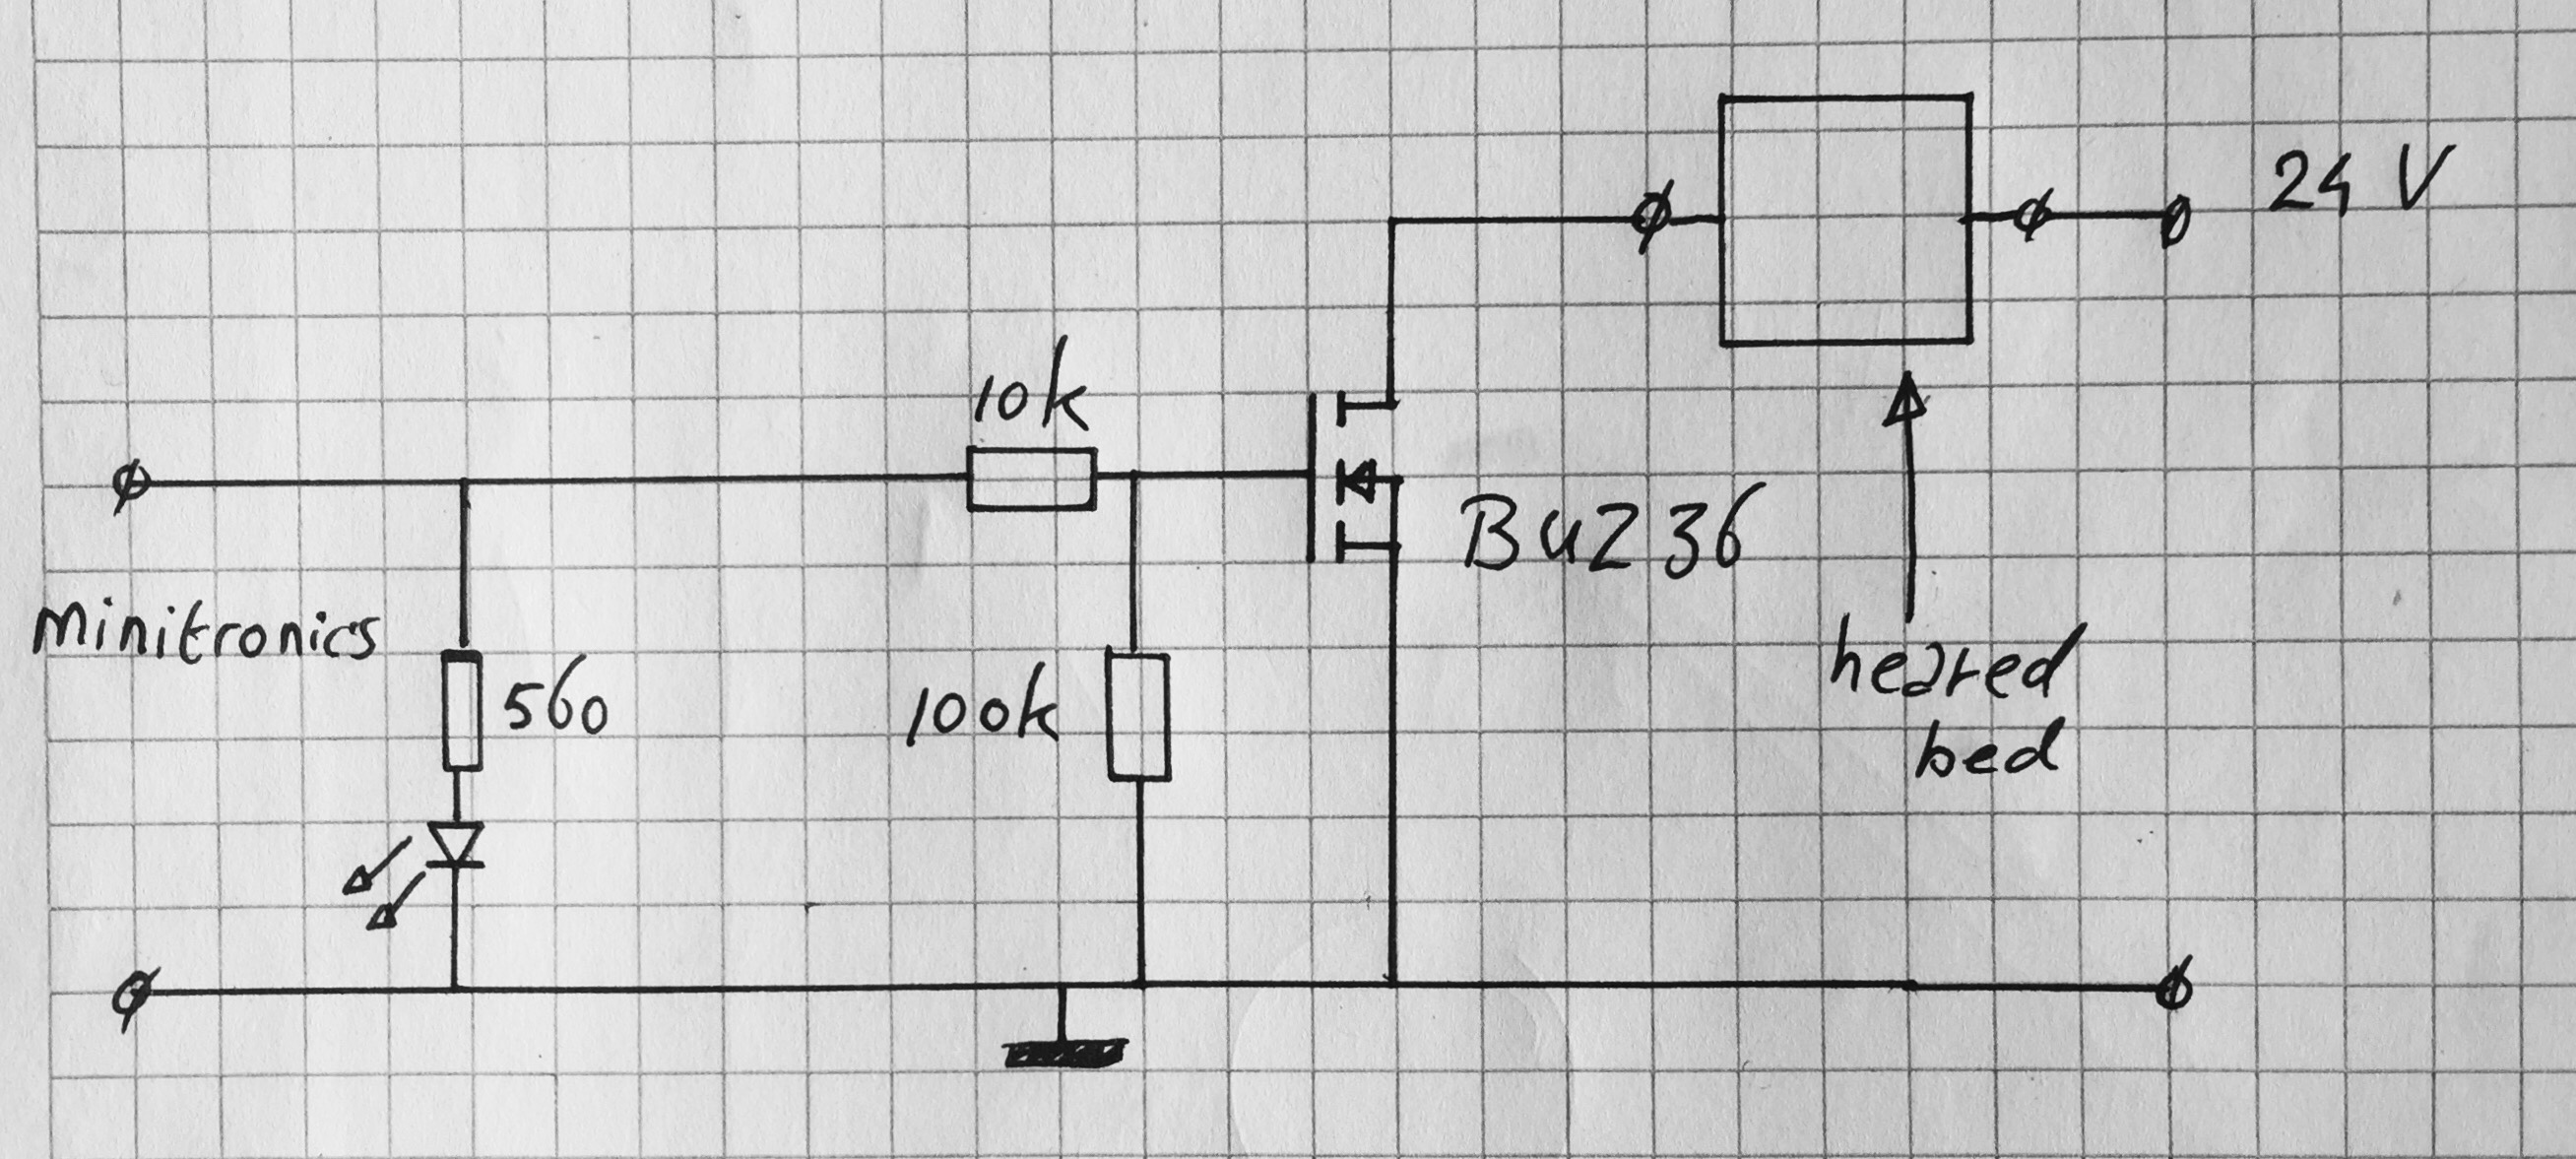
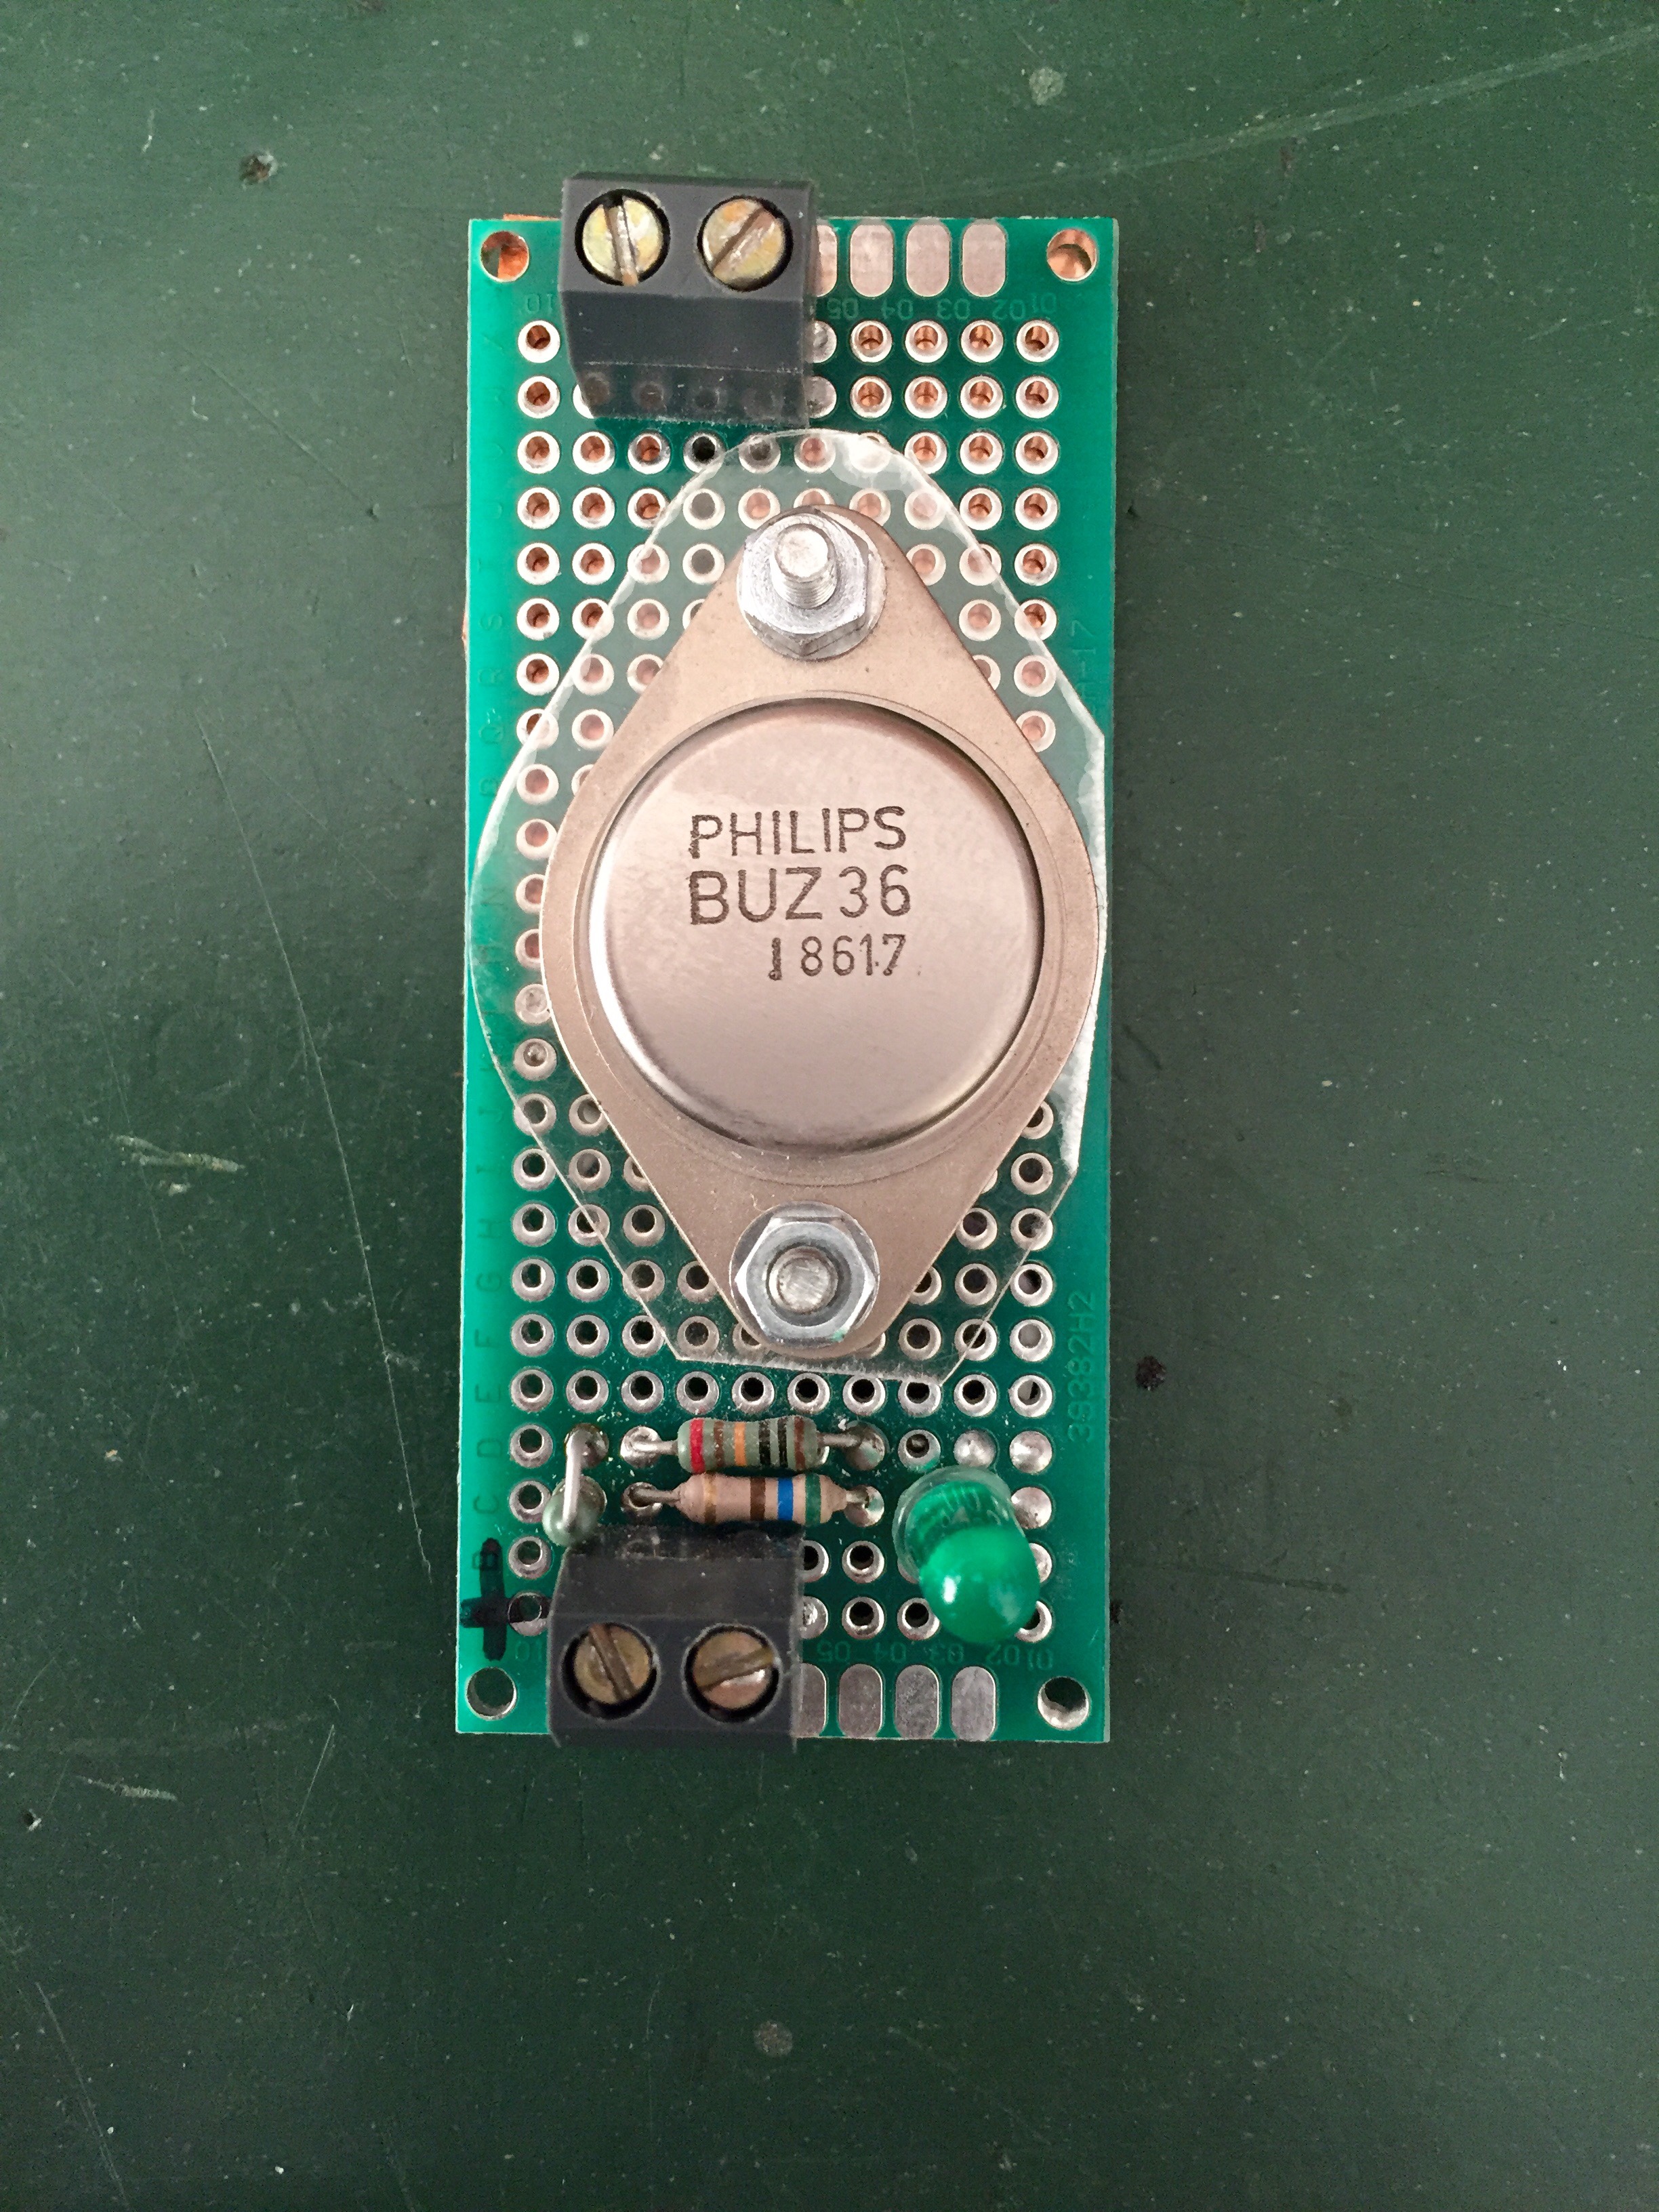
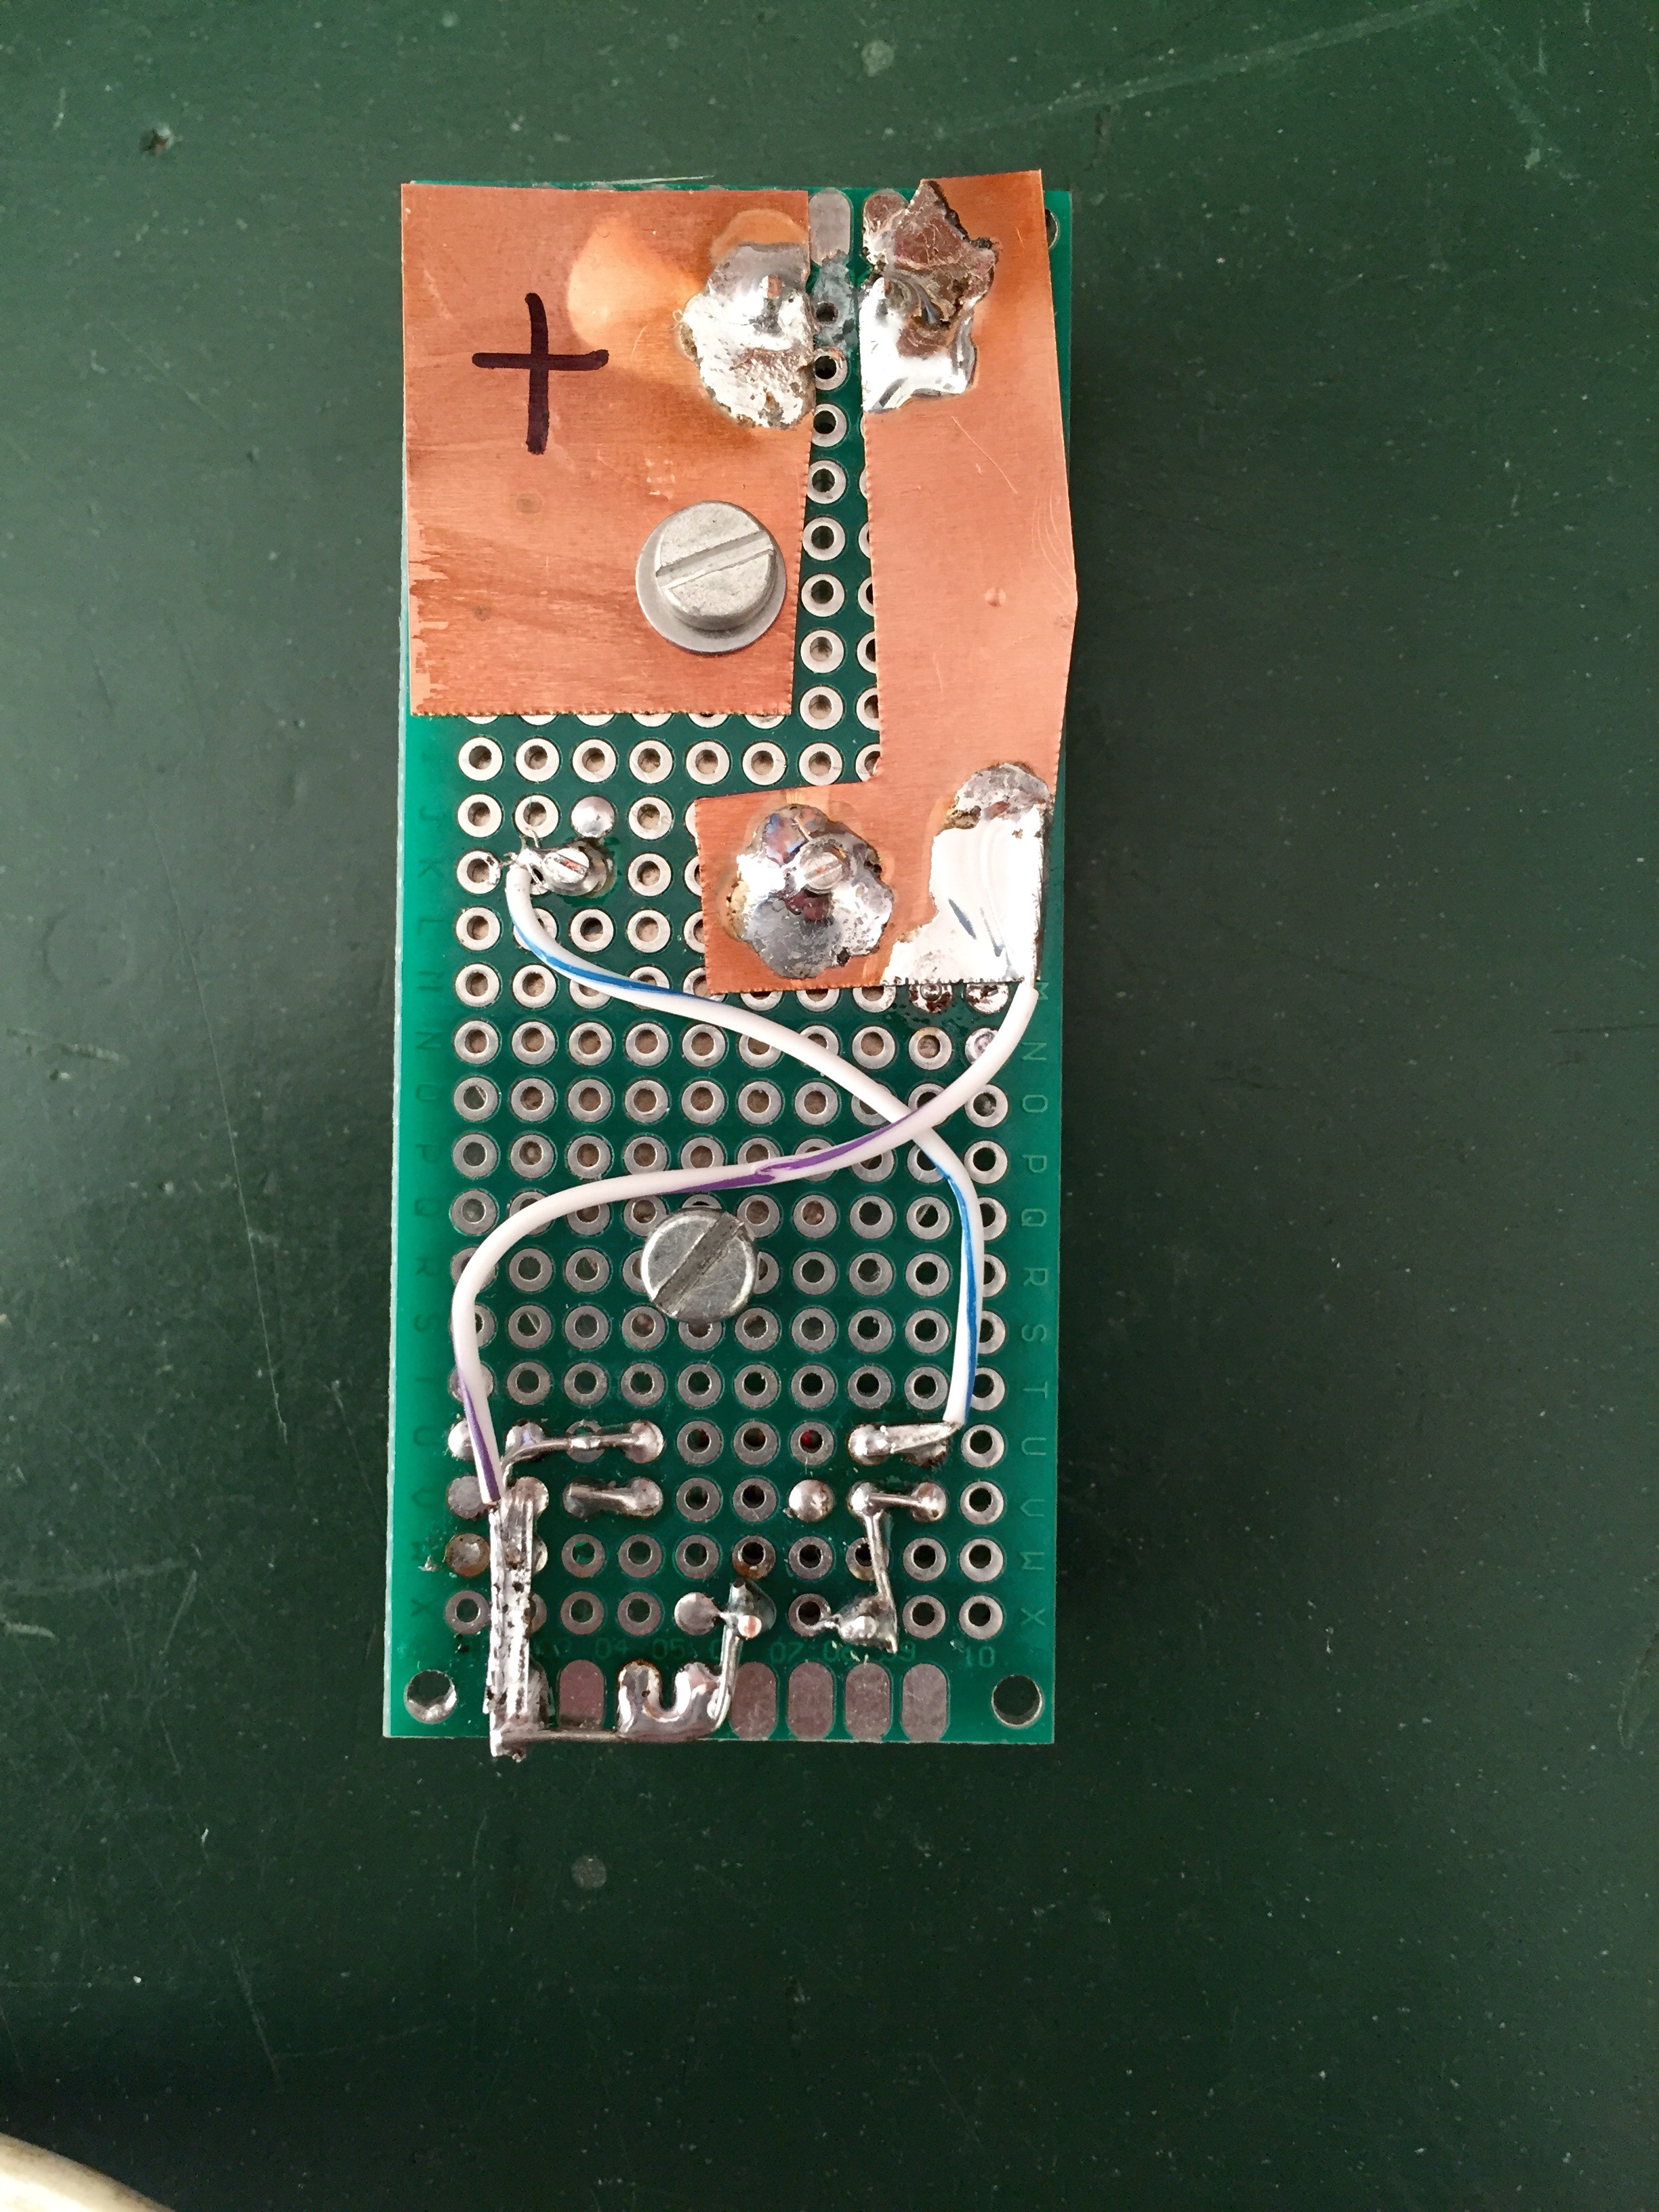
From the bottom picture of the completed PCB you can see i use copper foil to create low resistance paths between the heated bed power lines. It’s probably not really necessary, but i had this stuff lying around, so why not use it 🙂
When you replace you non-heated bed for the MK3 heated bed, i suggest you replace to 3mm bolts with countersunk versions and use a deburring tool to fix the holes on the MK3 bed so the bolts don’t stick out so much, this will come in handy when you add the auto-tramming option.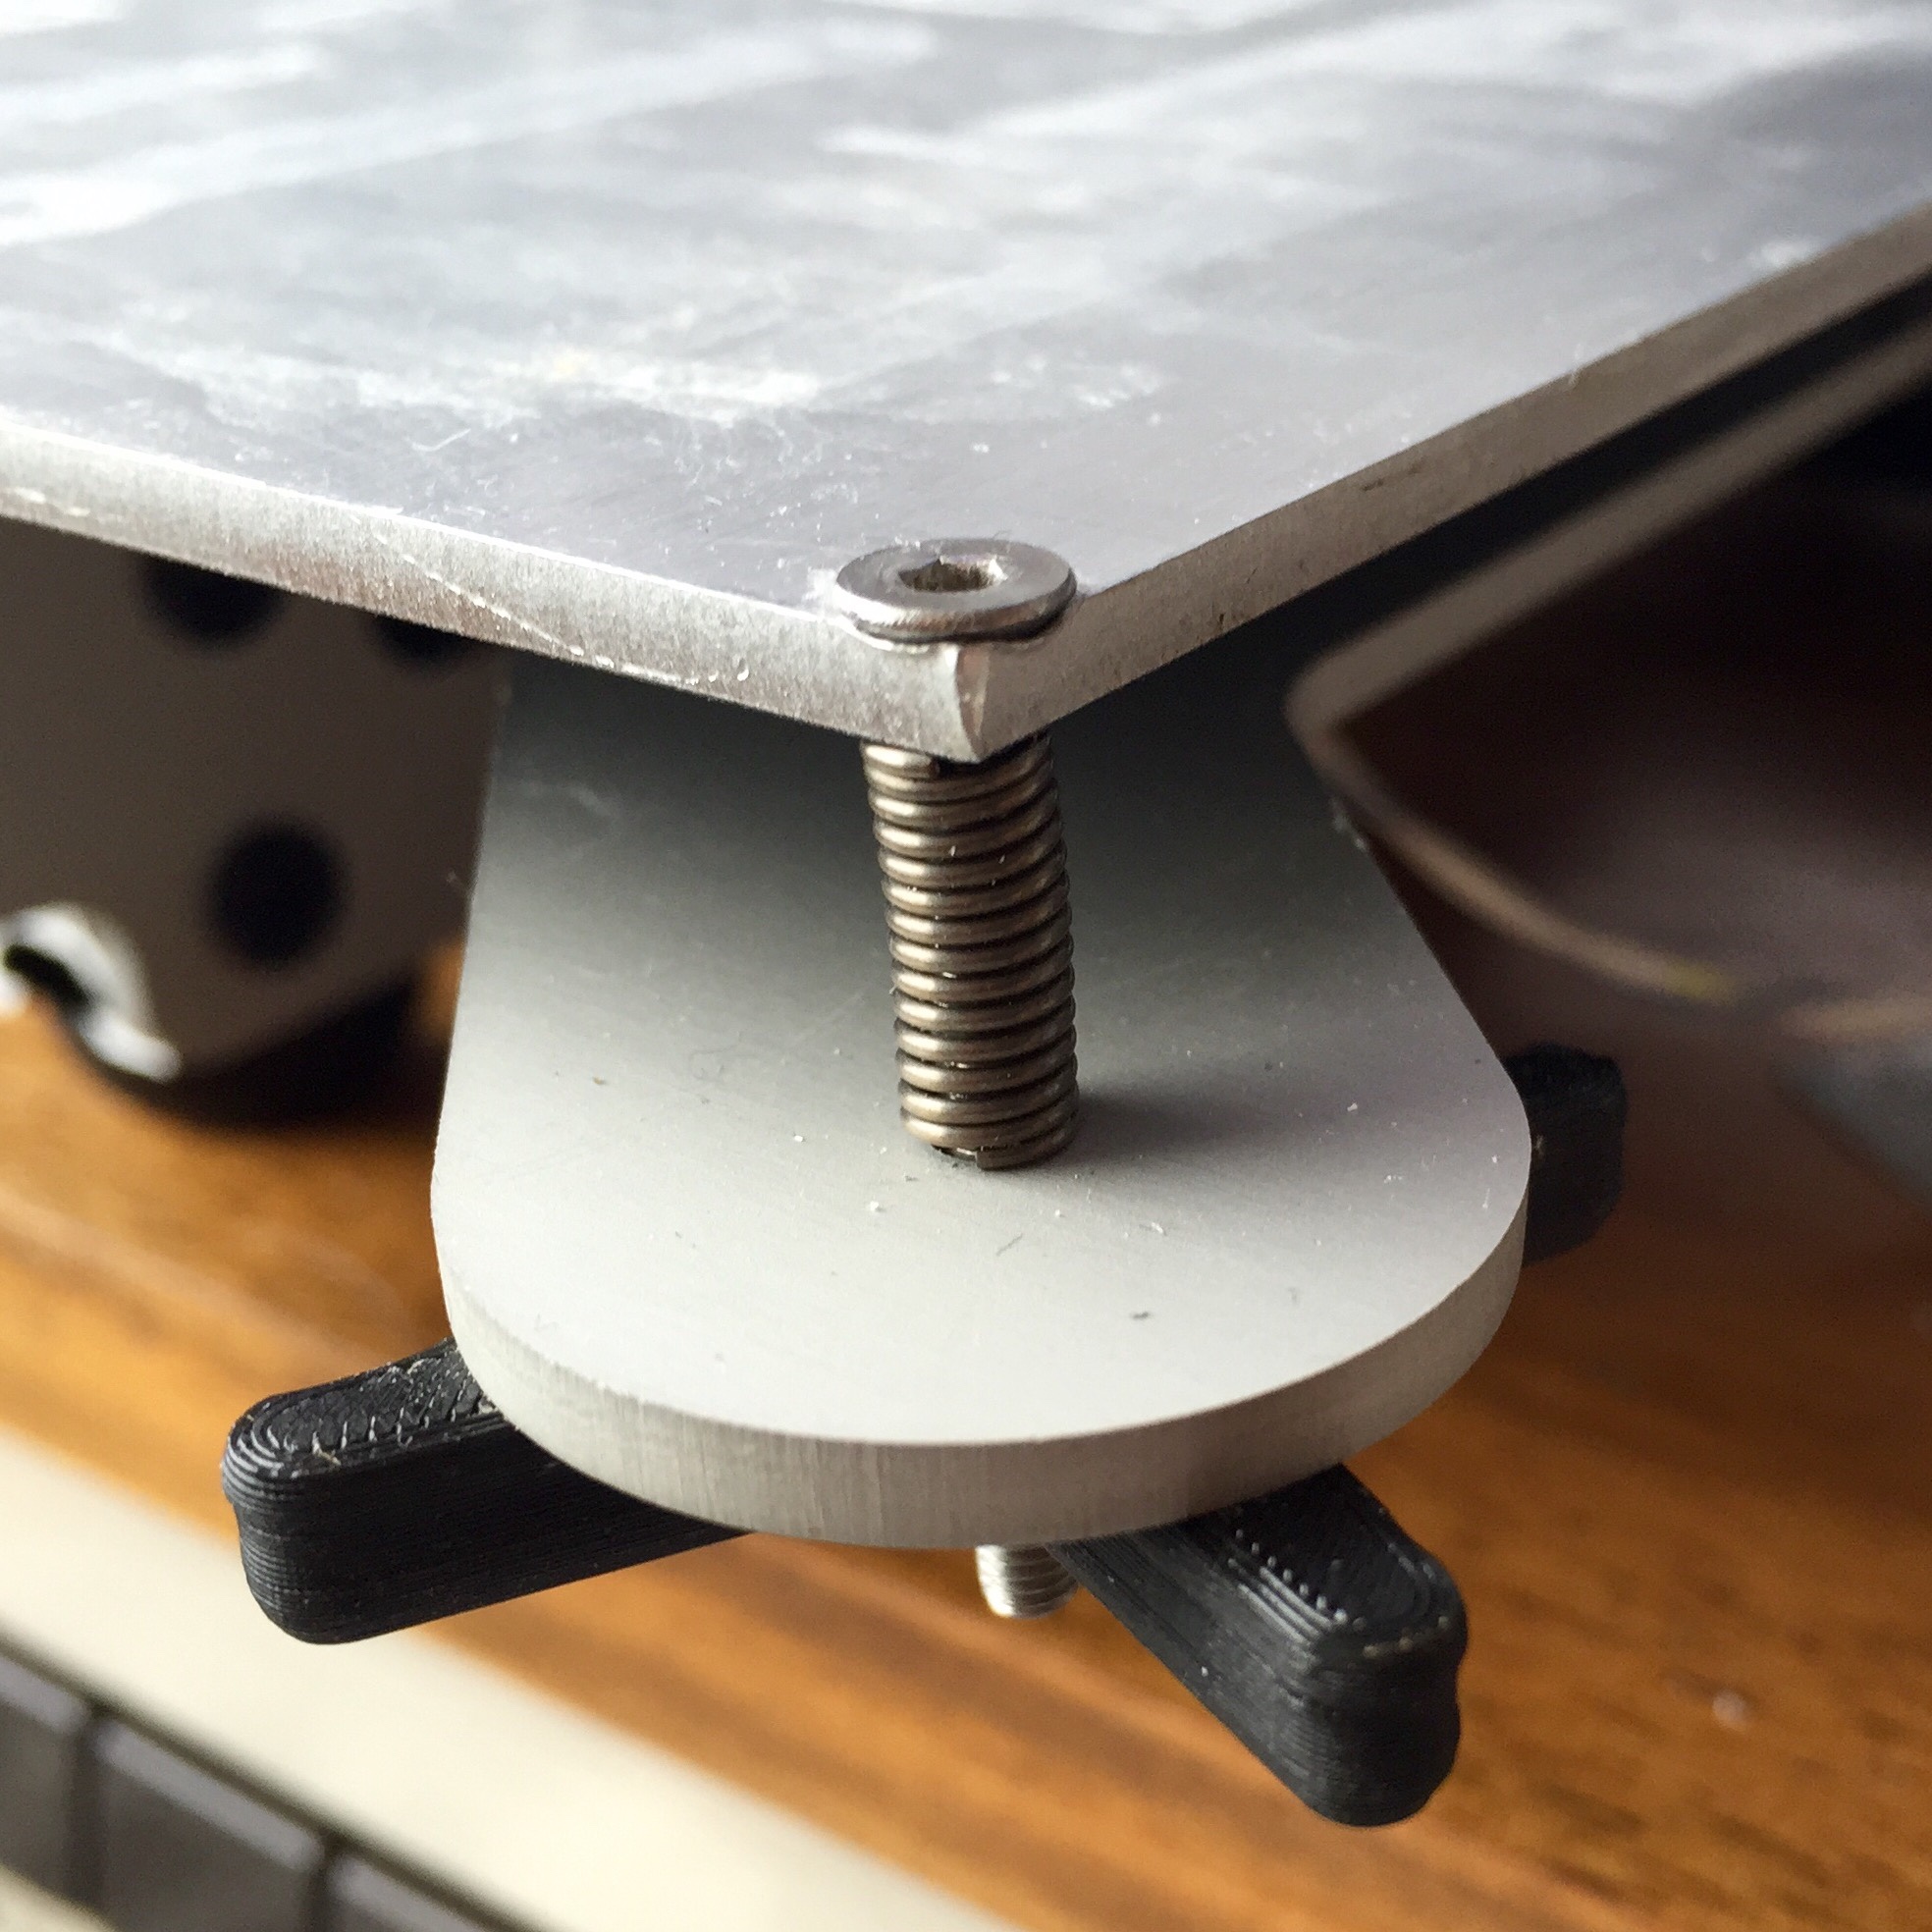
For how to fix the thermistor in the heated bed, there is a center hole in the middle where the thermistor fits. Be careful not to let it stick out above the bed.
I used which is heat resistant for temperatures up to 250 degrees celcius.
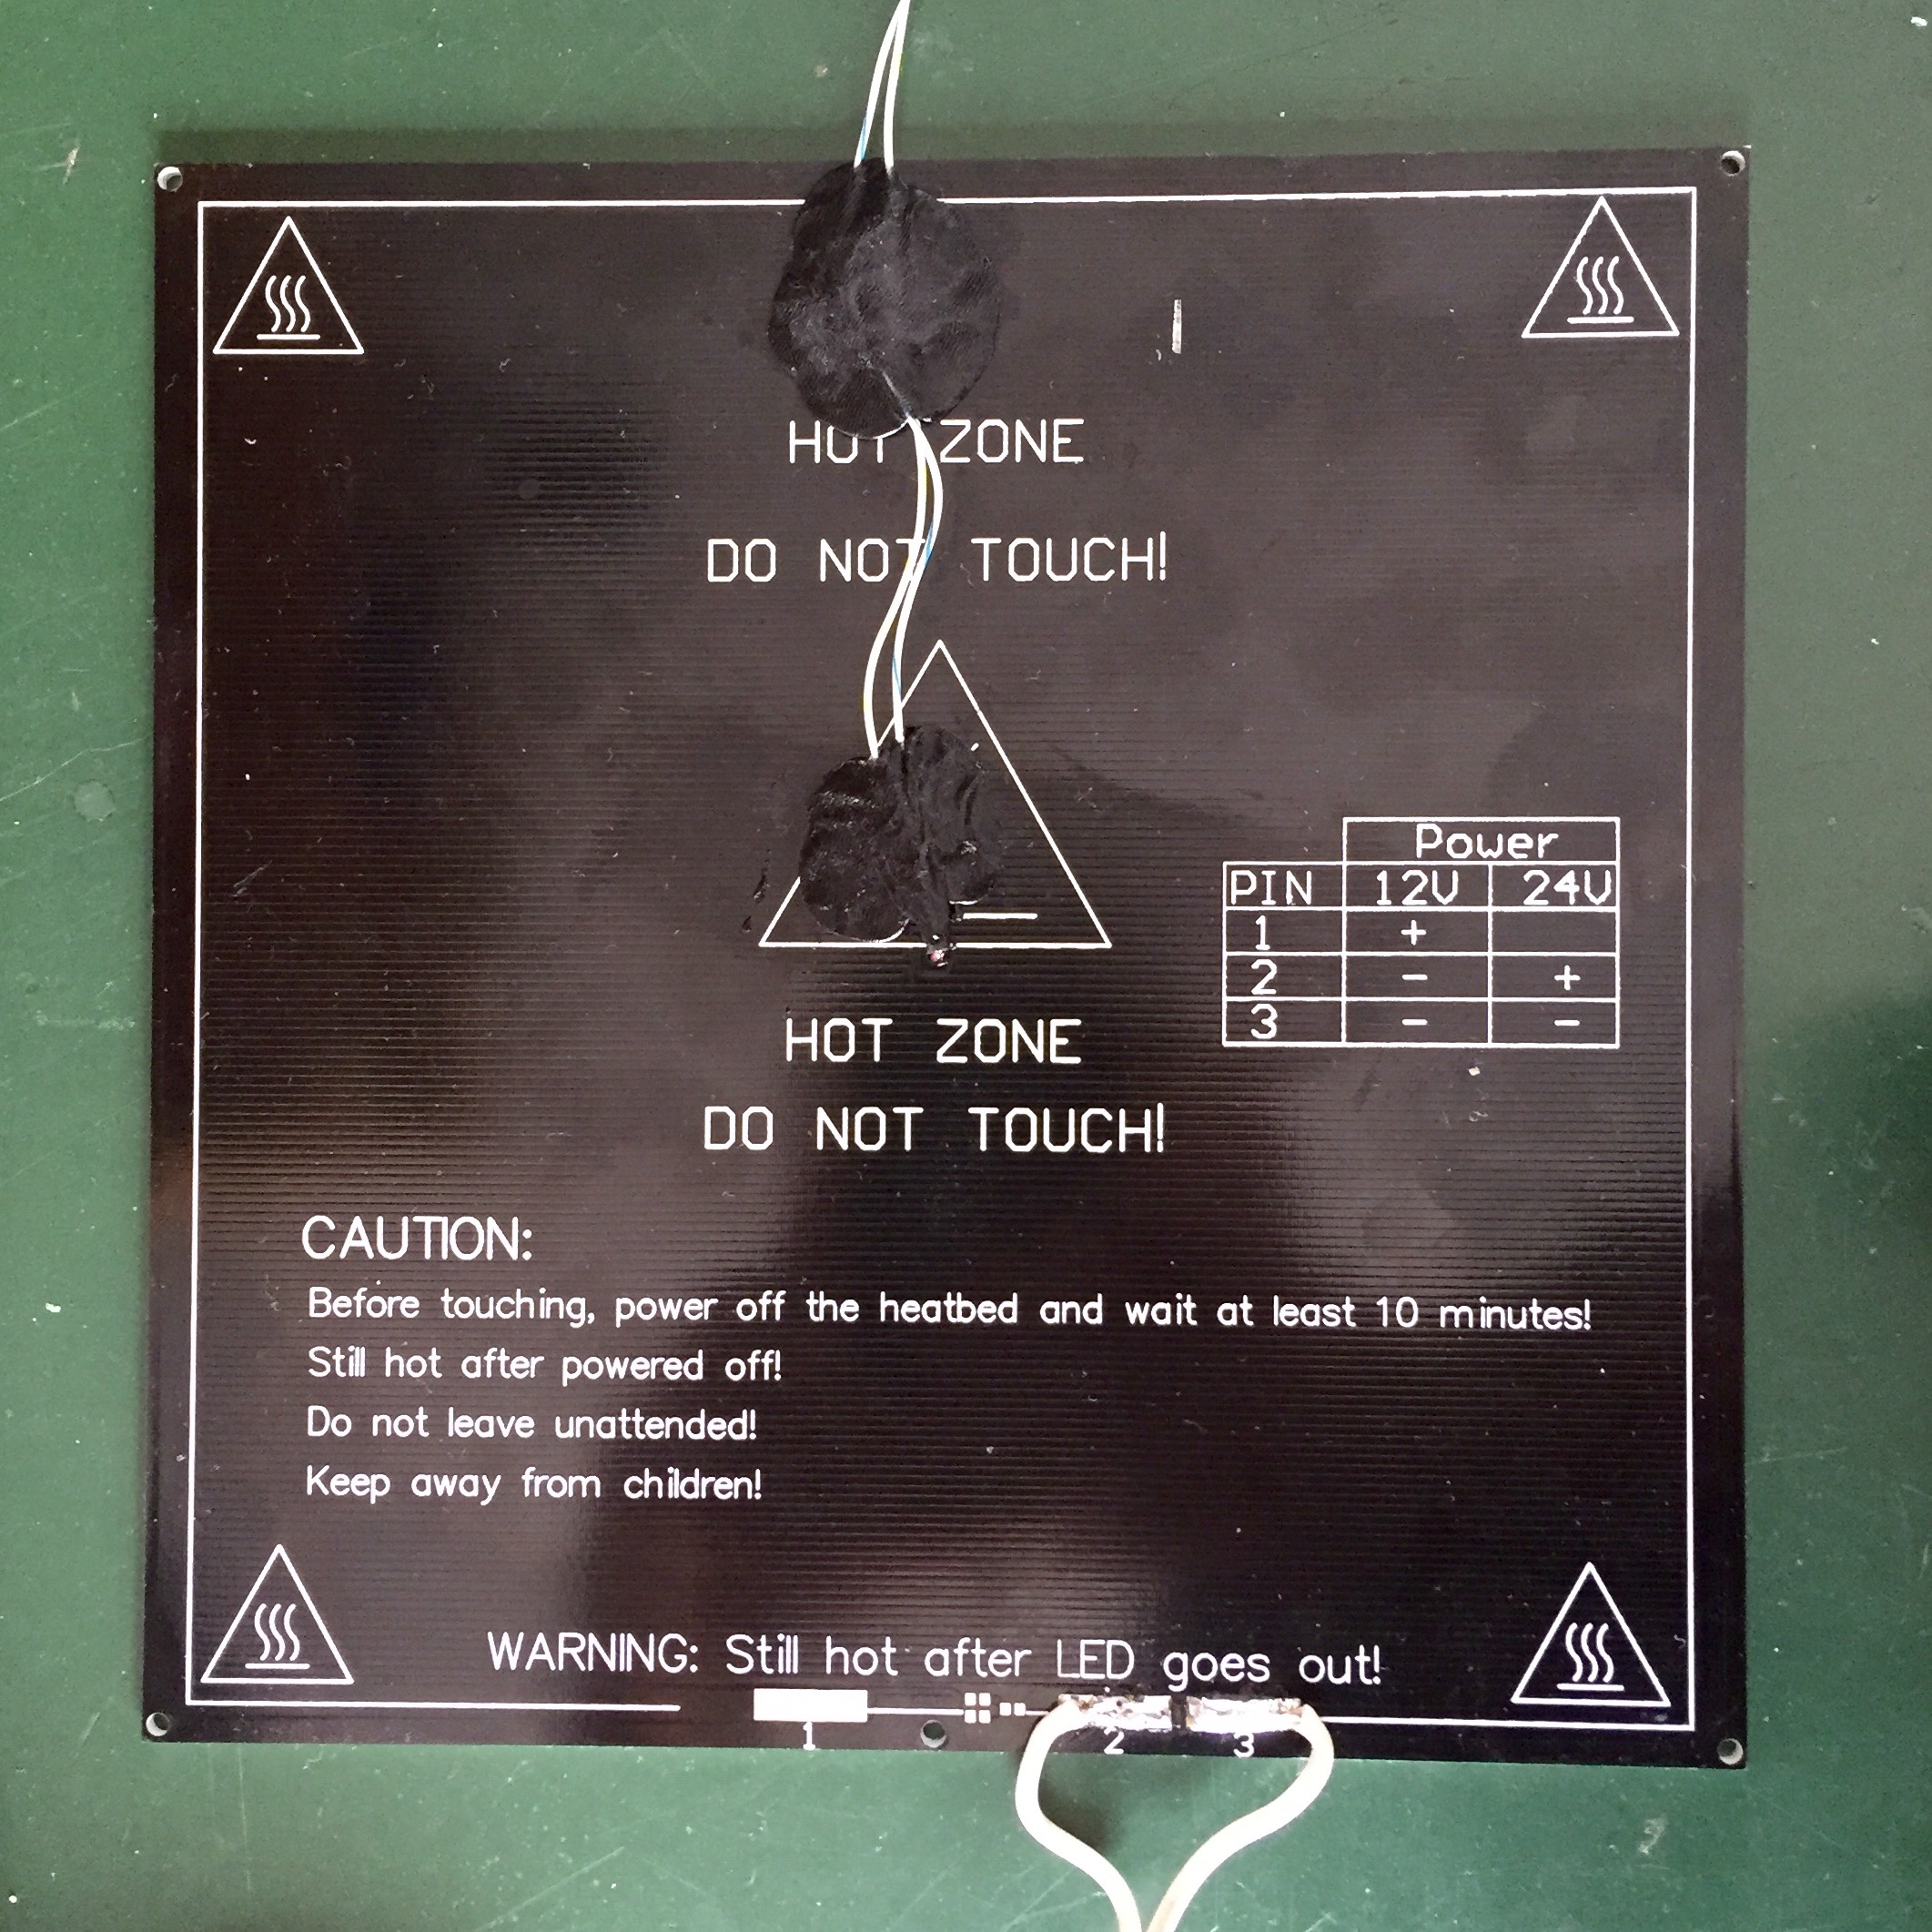 .
.
So the thermistor goes to the the “Thermistor HB” connector, polarity doesn’t matter. And the “Heated Bed” output from our minitronics goes to our circuit board. 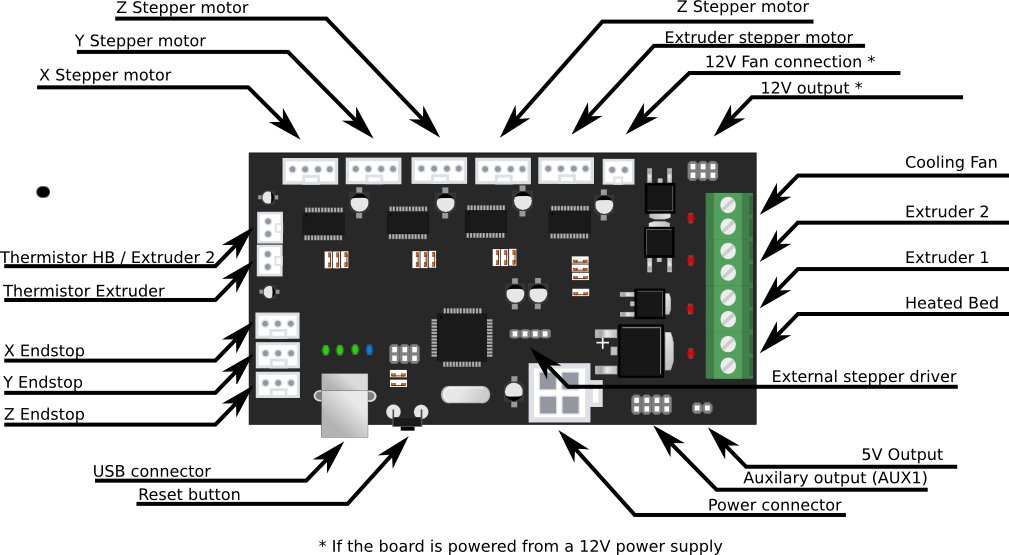
Software
When everything is connected it’s time to modify our Marlin software so that you can use the heated bed. You will need the Arduino Integrated Development Environment (IDE) to program your minitronics board (most other boards are also arduino like boards and are programmed the same way). For the minitronics, the easiest way is to download Arduino IDE version 1.6.3 from Reprapworld with the board pre-configured. From the same location you can also download the Marlin firmware for the minitronics, but i use the version supplied by Michiel on the Mamba3D website.
Start up the Arduino IDE, and load the Mamba3D firmware (select File -> Open -> Marlin.ino and it will load all the files). Set Tools -> Board to minitronics, and Tools -> Port to the right port (for me that’s COM3, but it could be different on your computer).
Now switch to Configuration.h and find this spot:
#define TEMP_SENSOR_BED 75
If you use a thermistor that’s allready properly defined, you can just enter the correct number here. The banggood thermistor were not defined in this version of Marlin, so i changed the value to “8” and modified that type in “thermistortables.h” to represent my thermistor (B=3950) with the data i found on this blog.
Always document your changes, so you know later on what’s alterd, e.g.
// Ewald 20150831, because of heated bed old value:

// TEMP_SENSOR_BED adjusted from 75 to 8 (and type 8 redefined in thermistortables.h )

#define TEMP_SENSOR_BED 8
For temperature control, you want to enable the PID regulator
#define PIDTEMPBED
This is a pulse-width type regulator that is also used on the extruder to reach the desired temperature quick en keep is accurately on that temperature. For the heated bed the precise temperature is not really necessary, but the power MosFET enables us to do so without heating up. If you decide to use a relay to drive the current to the heated board, you need to keep this commented out, so the bang-bang (on/off) style regulation is used. Next i changed:
#define MAX_BED_POWER 100
to “MAX_BED_POWER 255”, this allows to PID controller logic to drive the heated board at full power, so it’s quicker to heat up. You can see this behaviour in the LED on the minitronics board (and on our own driver board), the both light up continuously during heating up and start to flicker when to desired temperature is reached (that’s the PID regulator using PWM to keep on that temperature).
If you use 12V to drive the heated board (so double the current) or a solid state relay, it’s best to keep this value at “100” and check the heat dissipation on you components.
The parameters for my MK3 Aluminium heated bed driven by 24V were:
// ran autotune with this command: M303 E-1 C8 S50

    #define  DEFAULT_bedKp 179.27

    #define  DEFAULT_bedKi 30.40

    #define  DEFAULT_bedKd 264.34
But after compiling and uploading you should run the autotune logic yourself by specifying “M303 E-1 C8 S50” in the G-code manual entry of your repetier software, after this it will show the measured values for your setup.
The S50 on the end is the target temperature, i had to use that because my max-power was set at “100” during this tuning instead of “255” and therfore trying to reach 90 degrees timed out. But with max-power set to full (255), that’s not a problem anymore.
In “pins.h” there is a section for the minitronics board ( #if MOTHERBOARD == 702 ), you should check that your heater pins are properly defined there:
 #define HEATER_0_PIN 7 // EXTRUDER 1

 #define HEATER_1_PIN 8 // EXTRUDER 2

 #define HEATER_2_PIN -1
#define TEMP_0_PIN 7 // ANALOG NUMBERING
#define TEMP_1_PIN -1 //6 // ANALOG NUMBERING
#define TEMP_2_PIN -1 // ANALOG NUMBERING
#define HEATER_BED_PIN 3 //-1 //3 // BED
#define TEMP_BED_PIN 6 //-1 //6 // ANALOG NUMBERING
Last step is to edit thermistortables.h with the new definition for type 8, or you can download my version of thermistortables.h
When you have made all these modifications, click “Verify” in the Arduino IDE and it should compile properly.
After that upload the code to your minitronics and see if you get a reading on the temperature of the bed.
Next switch on the bed heating in the Manual Control window of repetier and it should heat up.
Last thing to do, is update your Slic3r configuration with settings so you can choose “Heated Bed” when slicing
an object. You can download the Mamba3D config for this, or edit your own. I mainly print PLA, and that’s just heating up the bed to 50 degrees (Celcius) and keeping it at that temperature untill the print is finished. Other materials require other bed temperatures.
So that’s all,
below is an overview of the components used.
Have fun!
Shopping list
| item | price indication (on banggood.com) |
|---|---|
| 3MM MK3 Aluminum Board Heat Bed | €12.50 |
| 24V/5A power supply | €12.85 |
| thermistor | €2.50 for 10 |
| Electronics board | €3.04 for 5 |
| IRFZ44N Power MosFET | €1.27 for 2 (instead of the BUZ36) |
| Resistors | €2.83 for 600 |
| LED | €2.04 for 100 |
| total cost | €35.76 |