One year (and a bit) ago i wrote a post on how to install Backtrack 2 onto an USB stick. Recently the beta version of BackTrack 3 is released and the guys from BackTrack even made a special version to install on a 1GB USB stick: grab the torrent here.
Among the many uses of BackTrack are:
- Penetration Testing
- Digital Forensics
- Zero Trace usage of a computer (harddisk is untouched)
- Wireless sniffing, WEP crack, wardriving, etc.
- Listening to SomaFM radio
- Cracking various passwords
- and much more….
The USB stick version fully utilizes the space available to cram it with tools, a total of 953 MB. Also this version includes a script to make the USB stick bootable, so it’s almost childplay now to make your own hacker toolkit keychain. Here is a step by step howto.
Step 1
Mount a 1GB USB stick. If your system does not automatically mount the filesystem, have a look with dmesg | tail and mount it by hand, e.g.
mkdir FF ; mount /dev/sdc1 /FF
Wipe all info from the stick: rm -rf /FF/* and check there is enough space available:
[root ~]# df -h /FF
Filesystem            Size  Used Avail Use% Mounted on
/dev/sdf1             972M  4.0K  972M   1% /FF
You will need at least 953 MB there.
Step 2
Download BT3 from the torrent or use one of the mirrors to download with your browser, wget, curl, whatever.
Check the checksum with md5sum or sha1sum and if you’re paranoid, use both.
Extract the contents onto the USB stick:
[root ~]# cd /FF
[root /FF]# unrar x /tmp/bt3b141207.rar
[root /FF]# ls -l
drwxrwxr-x 6 root root 4096 2007-12-13 18:50 boot
drwxrwxr-x 7 root root 4096 2007-12-13 18:22 BT3
-rw-rw-r-- 1 root root  284 2007-12-13 19:13 INSTALL.txt
Read the extensive installation information
[root /FF]# more INSTALL.txt
USB Install:

Copy the "boot" and "BT3" Directory to the root of your USB device.
Under Linux, change directory to the freshly copied /boot directory on the USB device.
MAKE sure your're in the "boot" directory on the USB device!
run ./boostinst.sh
unmount usb device.
Voila.
Step 3
And do the deed:
[root /FF]# cd boot
[root /FF/boot]#./bootinst.sh
-=-=-=-=-=-=-=-=-=-=-=-=-=-=-=-=-=-=-=-=-=-=-=-=-=-=-=-=-=-=-=-=-=-=-=-=-=-=-=-
                        Welcome to Slax boot installer
-=-=-=-=-=-=-=-=-=-=-=-=-=-=-=-=-=-=-=-=-=-=-=-=-=-=-=-=-=-=-=-=-=-=-=-=-=-=-=-

This installer will setup disk /dev/sdc1 to boot only Slax.

Warning! Master boot record (MBR) of /dev/sdc will be overwritten.
If you use /dev/sdc to boot any existing operating system, it will not work
anymore. Only Slax will boot from this device. Be careful!

Press any key to continue, or Ctrl+C to abort...
press return, and:
Flushing filesystem buffers, this may take a while...
Setting up MBR on /dev/sdc...
The Master Boot Record of  /dev/sdc  has been updated.
Activating partition /dev/sdc1...
No partition table modifications are needed.
Updating MBR on /dev/sdc...
Setting up boot record for /dev/sdc1...
Disk /dev/sdc1 should be bootable now. Installation finished.

Read the information above and then press any key to exit...
All that is left to do is reboot your system and boot from the USB stick.
On Dell laptops you might have to press F12 to select the boot medium.
If everything went well, you will be greeted by the boot image:
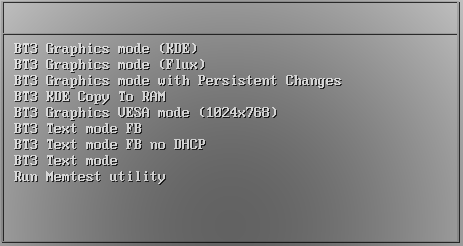
Have fun & stay safe.