
Play Youtube Video’s on a TV with a Raspberry Pi
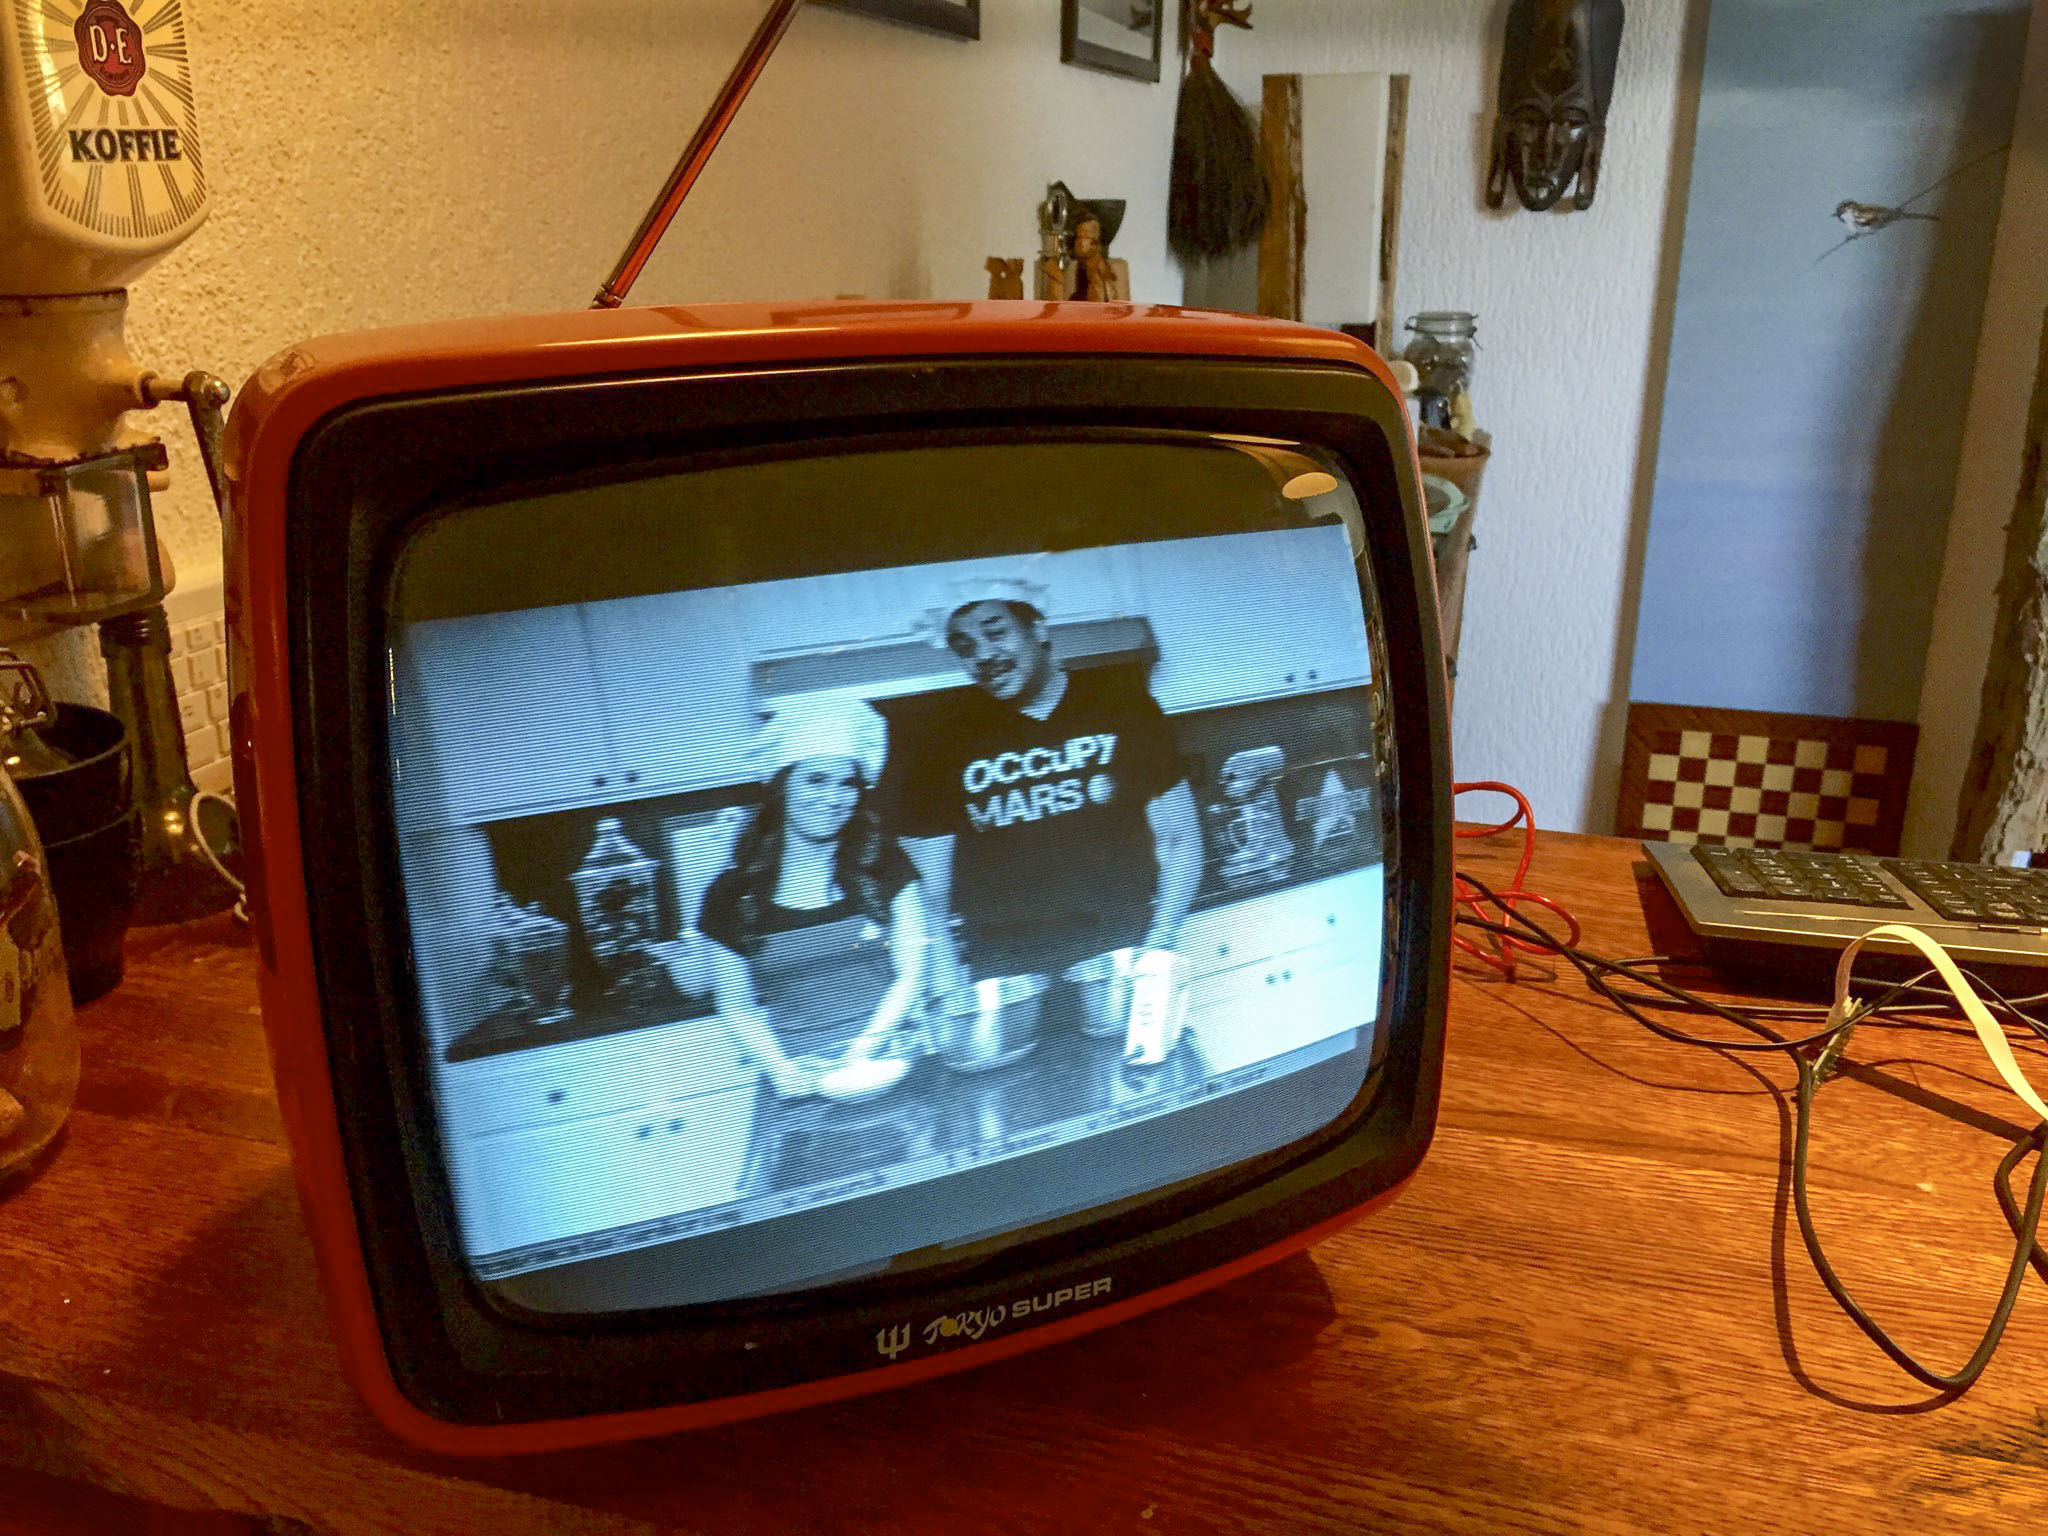
Back at home we bought a similar orange portable TV, which stood really nice on the bar in our orange kitchen. The next step was of course to get content on the screen, so extending the TV cable and having nothing interesting on the telly or doing something differently.
Raspberry Pi Tv Broadcasting Station
The Raspberry Pi has a video output (CVBS) on an RCA connector. When combined with an UHF modulater, this would provide the right signal to feed into the antenna input of the old TV. I bought a RF modulater of ebay, they are very cheap.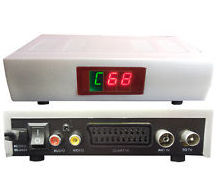 . One thing, this RF modulator is for PAL (Phase Alternating Line) video, if you live in the States, you’ll need something which supports NTSC (Never The Same Colour :). Once u start using the modulator, you will need to configure the audio subchannel frequency, in the Netherlands thats at 5.5MHz (PAL B/G standard).
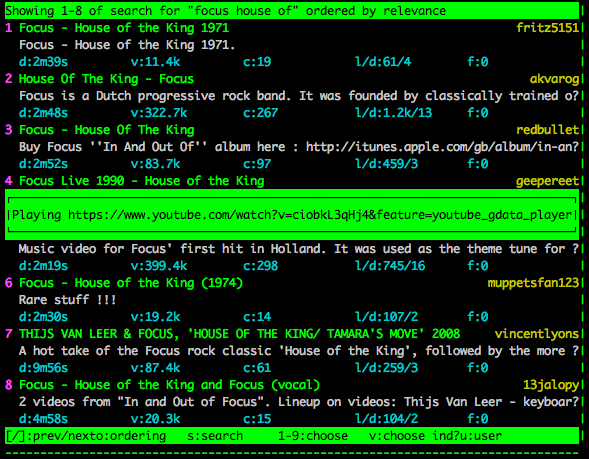
Now for configuring the Pi. Lets assume you have got one up and running (tutorials are all over the Internet). The software i used is whitey which can display youtube video’s in console mode (so you don’t have to mess around running X-Windows).
You only need a couple of things for this. At first download youtube-dl
sudo apt-get install youtube-dl
Whitey itself is not in the debian repository, but since it’s a python program it can be easily installed with those tools. You will need “pip” to do that:
sudo apt-get install python-pip
And next use pip to install whitey
sudo pip install whitey
On the Raspberry Pi you need omxplayer to display the video’s. Normally that should be possible by using “pi-yt”, but there is a bug which prevents it from running (at least on my Pi). But with linux there is always an other way to do things, so use the next command line:
yt --player=omxplayer
That should give you a text screen with youtube video’s. Now try to play one by entering the number of your choice.
Connecting everything together
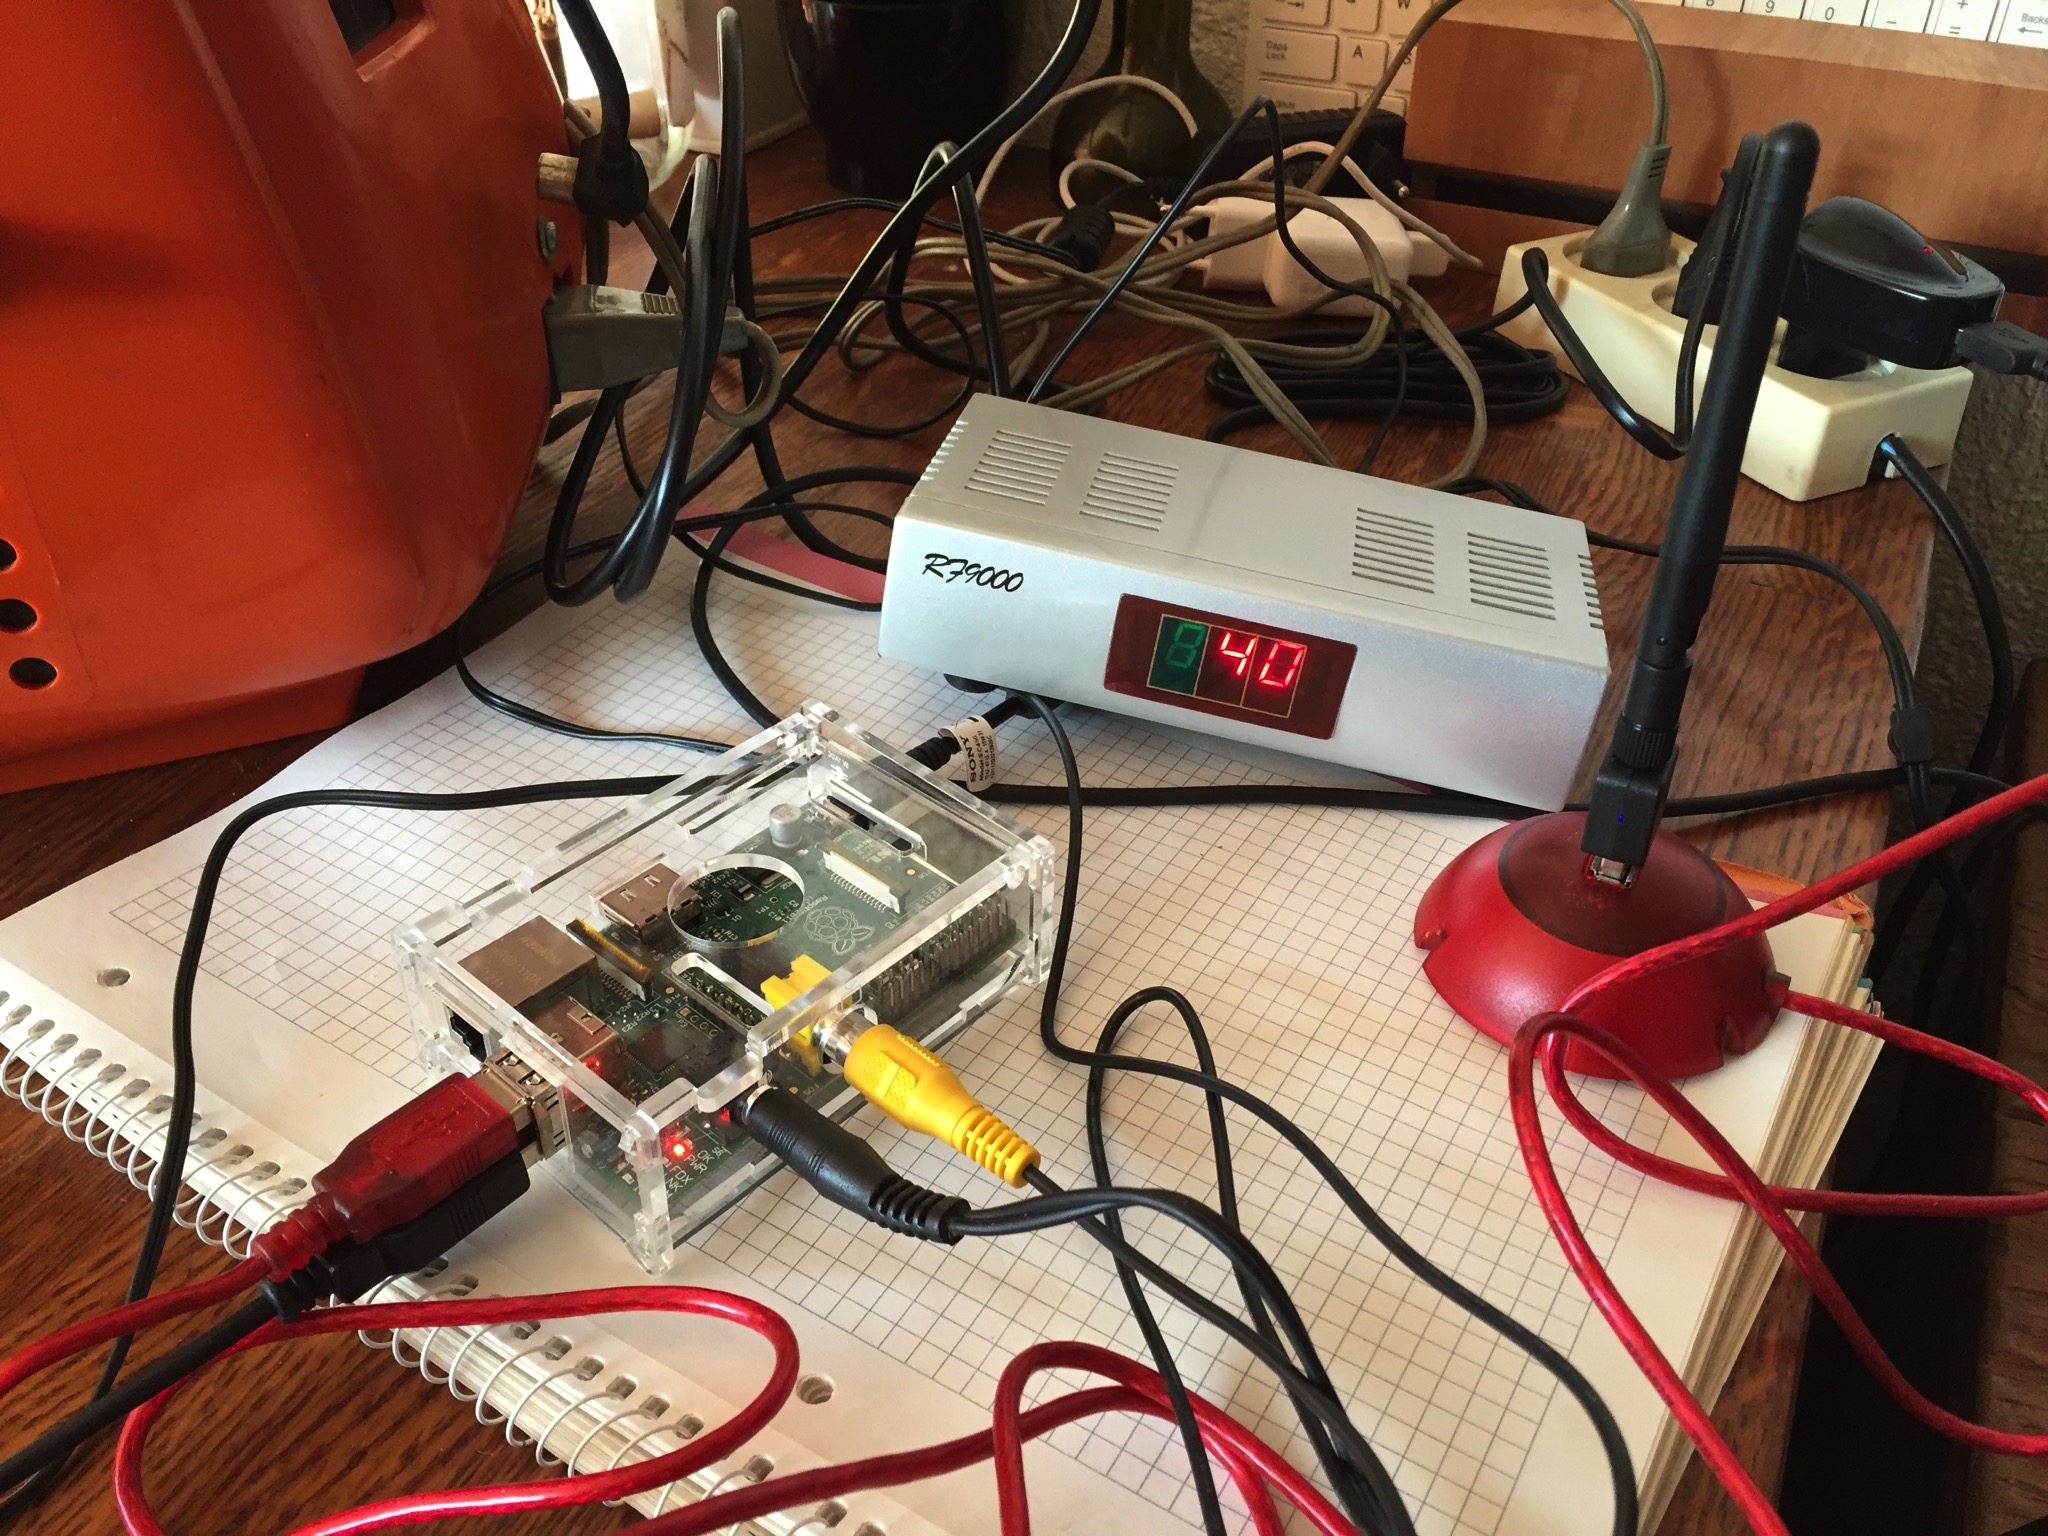
If you used the HDMI connection on you Pi during this setup, do a shutdown and disconnect the HDMI and connect the RCA video out connector to the RF modulator. Also connect sound to the modulator (you will need a conversion cable for that). Next switch on the Pi and the RF modulator. Select a channel, connect to your TV and tune into that channel.
On my TV the text is barely readable, but still enough to give you an indication of whats going on.
Remote Control
sudo apt-get install screen
Next fire it up by typing in:
screen
Now you have a shell session that stays active when you disconnect and can ben taken over from another computer. Screen has many more handy features. So from type in the command to start up yt again:
yt --player=omxplayer
And now from an other computer use ssh to connect to your Pi:
ssh pi@ip-adress
when you have logged in, use screen to attach to the running session:
screen -x
And now you can search and play the youtube vid’s from here while they get displayed on your retro TV.
RetroCasting
The fun part is playing really old video’s because it’s like you have a time-machine, looking back into the past. The blurry picture and lofi sound just add to this experience 🙂
Have fun!