Domoticz
is a great open source domotica solution. 
If you have a Raspberry Pi lying around, it’s just a matter of downloading the SD-Card image from the site and there you go!
If you don’t have a Pi, buy one, it’s only thirty-some euro’s which is next to nothing for the versatility you get. Oh, and if you buy one, buy the Raspberry Pi B+ version since it has 4 USB ports and a 40 pin I/O header and it uses less energy.
Allthough Domoticz supports a lot of hardware out of the box (check the Wiki), the fabulous Philips Hue lights are not among them, but it’s dead easy to integrate these using the standard functionality available.
So how is it done?
Step 1
The Hue Lights come with a Hue Bridge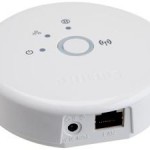
which interfaces between your (wireless) network and the Zigbee protocol that the lights use. You need to find the ip-adres of the bridge, you can do that by looking into your router for the connected devices. The MAC address of your bridge is shown inside the Smartphone App (mine starts with 00:17:88, yours probably does too). While you’re in the router, make sure that the bridge gets a static IP address, that means coupling the bridge MAC address with a fixed IP address. Why? Because we’ll be using that IP address in our scripts and if it changes the scripts wont work 🙁
And, since you are here, be sure to do the same for the IP address of your Raspberry Pi!
Ok, if you found the bridge IP address and you made it fixed, it’s now time to add an user to the bridge so we can use that to control the lights. This can be done by following the tutorial from Philips about the Bridge API (API stands for Application Programming Interface).
Basically you fire up a browser (on the same network as the bridge lives) and go to:
http://<bridge ip address>/debug/clip.html
From there you can use the API GUI to execute the command to create a new user: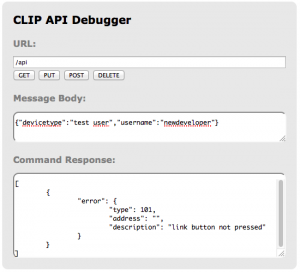
and as a matter of security you have to press the link button on the Bridge before the command is executed.
When all went well you should now be able to control the lights through the CLIP API Debugger webpage.
And also when you connect to your Pi from the command-line (ssh to the IP addres with user: pi and password: raspberry) you can set the lights with this command:
curl -H "Accept: application/json" -X PUT --data '{"on":true}' http://ip-address/api/newdeveloper/lights/1/state
which turns the light on, and
curl -H "Accept: application/json" -X PUT --data '{"on":false}' http://ip-address/api/newdeveloper/lights/1/state
which turns it off again.
If you get an error message about curl not being available, you might need to install it first with:
sudo apt-get install curl
Step 2
This is about integrating Hue into Domoticz. After you fired up your Pi with the Domoticz SD-Card you should be able to access the web-interface on port 8080 of your P1: http://ip-address-of-Pi:8080
Goto Setup -> Hardware and add a Dummy device as shown in the screenshot. 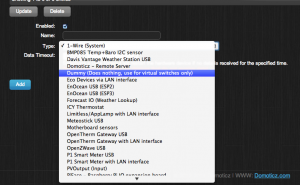 , give it a name, and keep the state on enabled
Next go to the Switches TAB and click the button on the left to add a Manual Light/Switch
Select the name from the virtual hardware device you just added and give this new switch some meaningful name.
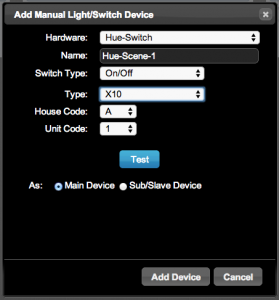 You can keep the type on X10, since that doesn’t matter; and also don’t worry about changing the X10 channel settings.
The new Light/Switch should now show up in the Domoticz Switches TAB.
Step 3
Now are we going to add the functionality to the new switch. Click the Edit button on the switch and that will give you a window like this:
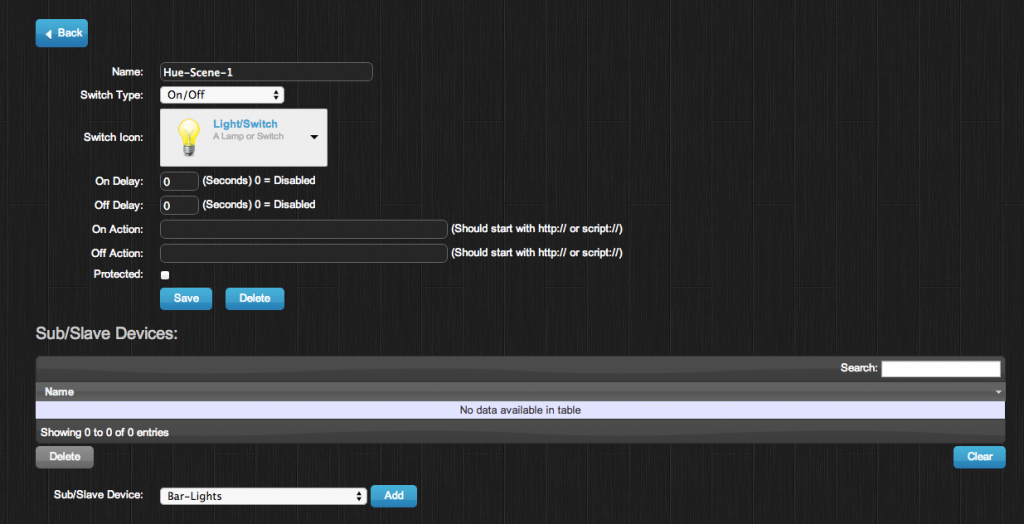
Now for the On Action we are going to use a very simple script; ssh into your Pi with the pi user (password = raspberry) and change to the scripts directory:
cd domoticz/scripts/
Copy the contents of the script below and don’t forget to fill in the right IP address of the Hue Bridge.
#!/bin/bash

curl -s -H "Accept: application/json" -X PUT --data '{"on":true}' http://your-bridge-IP-Address/api/newdeveloper/lights/1/state
Save the On script:
cat > hue_light_1_on.sh

#!/bin/bash

curl -s -H "Accept: application/json" -X PUT --data '{"on":true}' http://your-bridge-IP-Address/api/newdeveloper/lights/1/state

CTRL-D
And repeat this for the Off script.
cat > hue_light_1_off.sh

#!/bin/bash

curl -s -H "Accept: application/json" -X PUT --data '{"on":false}' http://your-bridge-IP-Address/api/newdeveloper/lights/1/state

CTRL-D
Make both scripts executable:
chmod 0755 hue_light*
And now fill in the reference to both scripts in de Domoticz webpage:
ON:  script:///home/pi/domoticz/scripts/hue_light_1_on.sh

OFF: script:///home/pi/domoticz/scripts/hue_light_1_off.sh
Save is and test the switch by clicking on the lights. If it doesn’t do what you expect try running the scripts from within the ssh session, turning the light on:
./hue_light_1_on.sh
and off:
./hue_light_1_off.sh
Step 4
Apart from making a switch for a single Hue Light it’s just as easy to make a scene switch where you control a couple off lights and their brightness and/or color. It’s just a matter of combining the various commands into that on and off script.
For instance:
#! /bin/bash

curl -s -H "Accept: application/json" -X PUT --data '{"on":true,"bri":203}' http://IP-Address/api/newdeveloper/lights/1/state ; \

curl -s -H "Accept: application/json" -X PUT --data '{"on":true,"bri":205}' http://IP-Address/api/newdeveloper/lights/2/state ; \

curl -s -H "Accept: application/json" -X PUT --data '{"on":true,"bri":91}' http://IP-Address/api/newdeveloper/lights/3/state ; \

curl -s -H "Accept: application/json" -X PUT --data '{"on":true,"bri":136}' http://IP-Address/api/newdeveloper/lights/4/state ; \

curl -s -H "Accept: application/json" -X PUT --data '{"on":true,"bri":255}' http://IP-Address/api/newdeveloper/lights/5/state ;
and the accompanying off script:
#! /bin/bash

curl -s -H "Accept: application/json" -X PUT --data '{"on":false}' http://IP-Address/api/newdeveloper/lights/1/state ; \

curl -s -H "Accept: application/json" -X PUT --data '{"on":false}' http://IP-Address/api/newdeveloper/lights/2/state ; \

curl -s -H "Accept: application/json" -X PUT --data '{"on":false}' http://IP-Address/api/newdeveloper/lights/3/state ; \

curl -s -H "Accept: application/json" -X PUT --data '{"on":false}' http://IP-Address/api/newdeveloper/lights/4/state ; \

curl -s -H "Accept: application/json" -X PUT --data '{"on":false}' http://IP-Address/api/newdeveloper/lights/5/state ;
Setting the Hue Lights Color is controlled this way:
curl -s -H "Accept: application/json" -X PUT --data '{"on":true, "sat":255, "bri":255,"hue":10000}' http://IP-Address/api/newdeveloper/lights/1/state
An easy way to set the right scene is to use your smartphone app until you are satisfied with the result and than request the parameters of all the lights to see how the are configured:
curl -s -H "Accept: application/json" -X GET http://IP-Address/api/newdeveloper/lights
Or request this information via de Bridge CLIP API Debugger page we used earlier.
Step 5
So far it’s pretty amazing how simple you can create you own domotica system for an apple and an egg 😉
But the really (REALLY!) big advantage is yet to come!
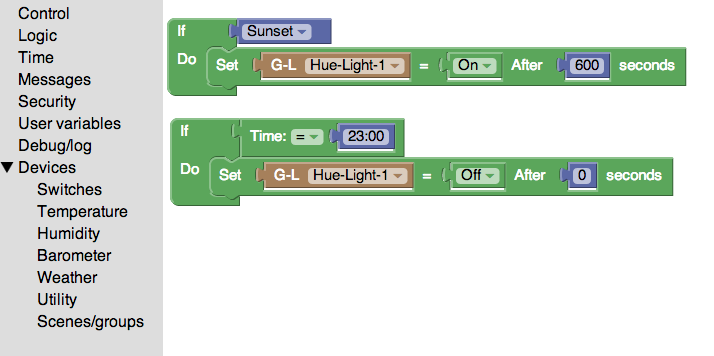
Domoticz has a Lego like logic system built in that’s called Blocky. It’s more ore less comparable with the functionality that you can get from IFTTT (If This Than That) but now fully within your own domotica system.
By using that system you can tell you Hue lights to activate 10 minutes after SunSet and go off at 11 pm. That means that you never have to adjust a timer in your live again because it’s getting dark earlier or later.

